
A Jam Class + Strawberry Jam with Aged Balsamic and Black Pepper

Making jam is something I look forward to each summer. This year, I’ve been busier than usual. The jam I had made earlier in the season is long gone, and it was looking like I wasn’t going to have an opportunity to get my hands dirty again before summer was over.
I hear from folks all the time how they love homemade jam, but they don’t know how to do it, or that it seems too hard to do on your own. When I heard my friends Dawn and Roxanne express interest in learning the process, I jumped at the chance to teach them.
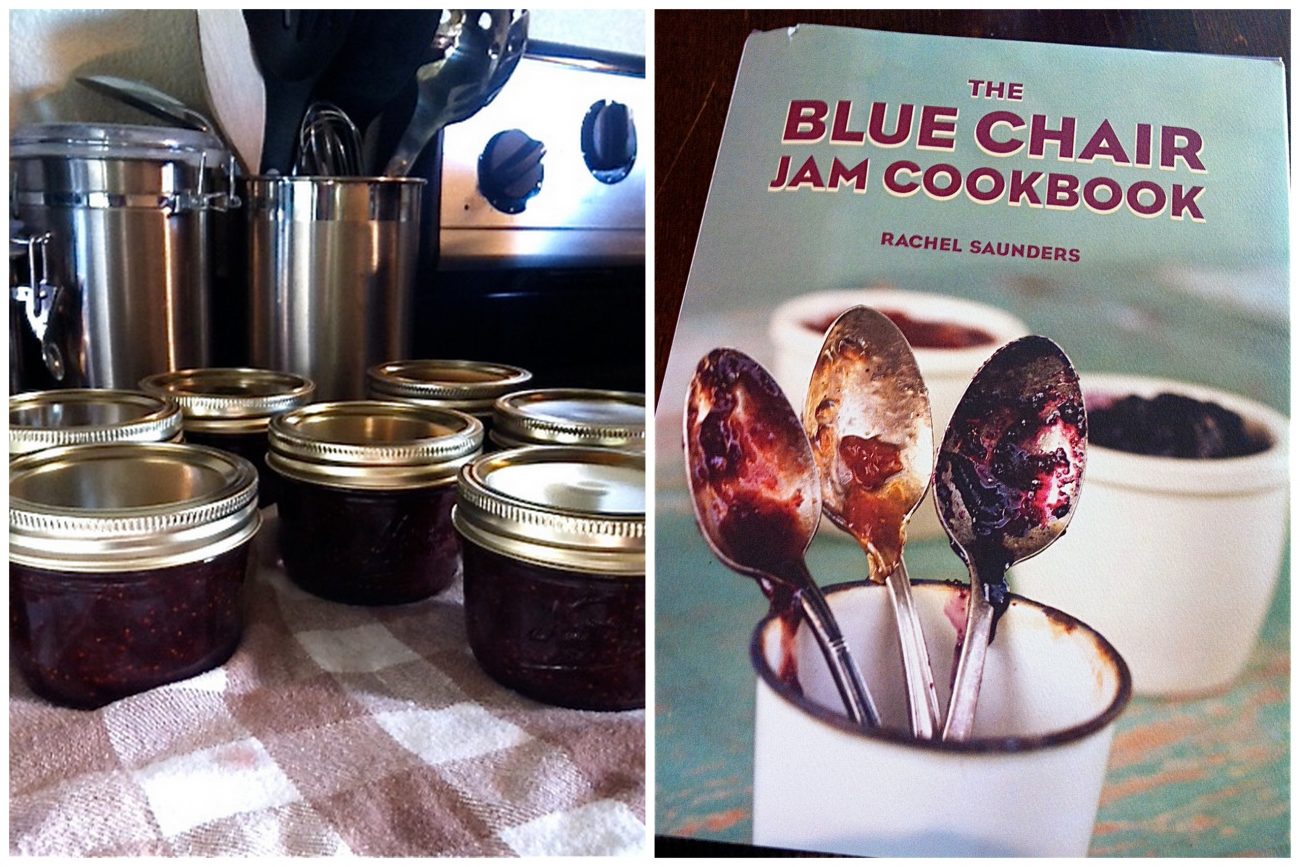
And I jumped at the chance to get a new cookbook, The Blue Chair Jam Cookbook. Oh, it’s a beauty. Really. Page after page is filled with gorgeous photographs and interesting jam recipes with unusual flavor combinations, as well as old favorites.
Since strawberries are a great price right now, we settled on the Grown-Up Strawberry jam recipe, which features Drambuie. Right before they came over, though, Dawn realized that Drambuie has honey in it. Since she is vegan, that wasn’t going to work. Luckily, there were plenty of other fabulous choices. The Strawberry Jam with Aged Balsamic and Black Pepper stood out to me. I already had some lovely aged balsamic, so why not?
Not only was this a jam class for Roxanne and Dawn, but I was learning something new as well. I had never made jam before without the addition of commercial pectin. I realized the recipes in the Blue Chair Jam Cookbook don’t call for pectin. Uh oh. What to do?
Apparently, you can make jam without adding pectin. And it’s not that much more difficult to do. It just takes a little testing when you think the jam is done. After reviewing the author, Rachel Saunders’ methods, as well as the methods in my Ball Guide to Preserving Book (and after trying a couple of Rachel Saunders’ methods), we soon found a favorite method: the plate test. To do this, you place a plate in the freezer before you begin, and you test some of the jam on the cool plate by running your finger through the jam. If it separates and slowly comes back together, it’s ready to process.
Teaching the ladies how to make jam was a wonderful experience. I didn’t realize how much I would enjoy teaching someone to do something that I’m so passionate about. It’s truly fulfilling. They were such good sports, and we had a lot of fun.
They learned how to do something new, and we all ended up with delicious results to enjoy later and to share with family and friends.
It was a great experience, and I hope to be able to teach more people in the future how to can jam.
If you’re new to canning, I highly recommend The Blue Chair Jam Cookbook. It is very comprehensive and descriptive.
Here’s Dawn’s (Vegan Moxie) post and Roxanne’s post about the class.

Strawberry Jam with Aged Balsamic & Black Pepper
From The Blue Chair Jam Cookbook, with revisions
Makes about 6 (8-0unce) jars
5 ounces strained freshly squeezed lemon juice
1 to 1 1/2 ounces aged balsamic vinegar
4 pounds hulled strawberries
2 pounds 10 ounces white cane sugar
Freshly ground black pepper
Prepare your jars, lids and rims, as well as your water-bath canning system, as described here.
Place a small plate in your freezer for testing the jam later.
Measure out the lemon juice in a glass measuring cup, then add enough balsamic vinegar to it to bring it up to just over 6 ounces.
In an 11- or 12-quart nonreactive pot, combine the berries with the sugar and half the lemon juice mixture. Place the pot over medium-low heat and cook, stirring constantly with a heatproof rubber spatula or wooden spoon. After a few minutes, when the juice starts to run and the mixture begins foaming a little around the edges, gradually raise the heat to high, stirring often. Add several twists of finely ground black pepper to taste.
Boil vigorously for 20 to 30 minutes, gently scraping the bottom of the pan every few minutes with the spatula to prevent the jam from sticking. If it begins to stick, decrease the heat slightly, being sure the jam continues to cook at a rapid boil. After 15 minutes, carefully taste the jam and add more black pepper, if necessary. Continue to cook, stirring and scraping the bottom of the pan frequently, until the foam subsides, the jam acquires a darker, shiner look, and the berries appear softened and saturated with liquid (this happens at about 25 minutes).
Remove from the heat. Do not stir. Let the mixture rest for a moment, then stir in the remaining half of the lemon juice mixture. Return the jam to the stove over medium heat and continue to cook, stirring frequently. If necessary, lower the heat slightly to prevent scorching.
After 3 to 5 more minutes, the jam should again look glossy and dark. At this point, remove from the heat and skim and discard the foam from the top of the jam with a spoon. To test for doneness, place a small amount of jam on the plate that has been in the freezer. Once the jam has come to room temperature, run your finger through it. If it separates, then slowly returns to its original form, it is ready.
The jam is now ready to process. Fill the clean jars, leaving 1/4″ of head space. Process the jars following these instructions.
Let cool completely on the counter and make sure all the lids have popped before storing.